“Contact Form 7 - Style Customizer” Documentation by “Gema75” v1.0
“Contact Form 7 - Style Customizer Documentation”
Created: 02/02/2015
By:Gema75
Email: gema75@gema75.com
Thank you for purchasing my plugin. If you have any questions that are beyond the scope of this help file, please feel free to email via my user page contact form here. Thanks so much!
Table of Contents
- About the Plugin
- Required for the Plugin
- Installing the Plugin
- Using the Plugin
- Add New style
- Assign the Style to the Contact Form 7
- Configure General Style
- Configure Input Field Style
- Configure Textarea Style
- Configure Submit Button Style
- Publish / Save Form Style
- Rules to follow
A)About the plugin - top
This plugin styles the "Contact Form 7" plugin for your needs . The Contact Form 7 - is very potential plugin downloaded over 23 million times from wordpress users . Your website may have a style , and the Contact Form 7 may not fit so well in your site . So using the Contact Form 7 - Style Customizer Plugin you can style the Contact Form 7 Plugin easily using the backend , adding the desired style to your forms . Can be assigned to each form a specific style created . Can be created unlimited styles and assign the desired one to your forms .
Unlimited Style for Unlimited Forms
Enable/Disable Option for Elements
Style Elements margins & paddings
Style Elements background color
Style Elements with Google Fonts
Style Elements with Font Size & Style
Style Elements with Font Color
Style Borders - color & type & radius
Style Form color backgrounds
Responsive width for elements
B)Required for the Plugin - top
The Contact Form 7 - Style Customizer Plugin is an addon and requires Contact Form 7 to be installed on your wordpress .
C)Installing the Plugin - top
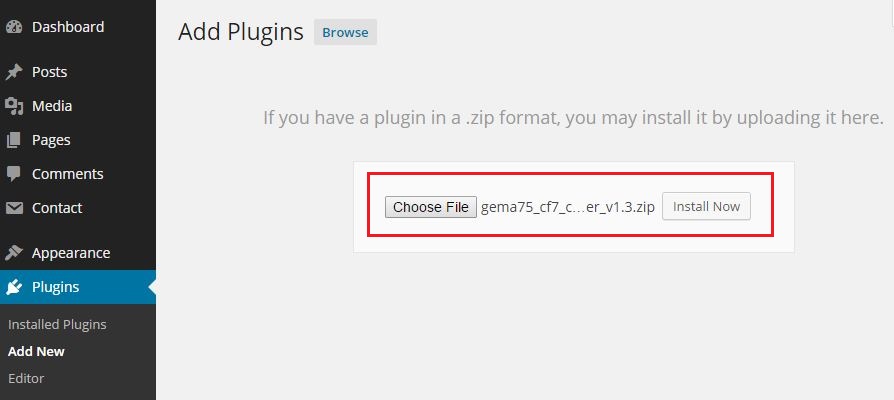
Installing via WordPress admin. After you have purchased the plugin go to wordpress administration area then on PLUGINS , ADD NEW , UPLOAD and browse to the zip file you downloaded and click INSTALL
D)Using the Plugin - top
Once installed go to the administration area and click on "CF7 Style"
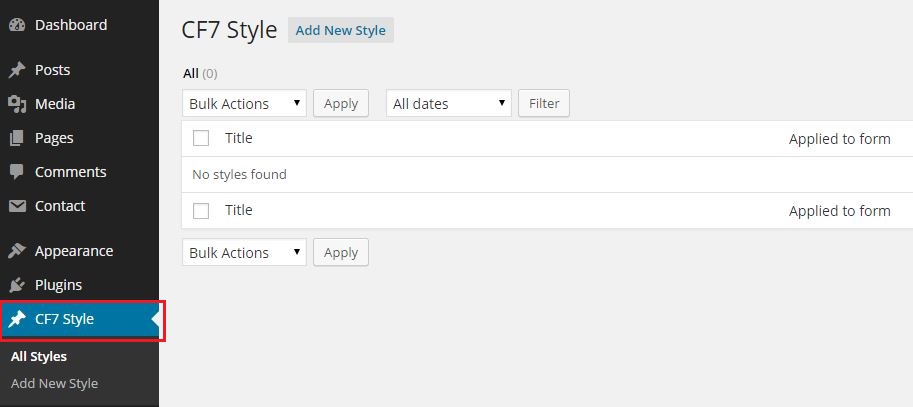 In this view will be displayed all the styles created and where are they applied .
E)Add New style - top
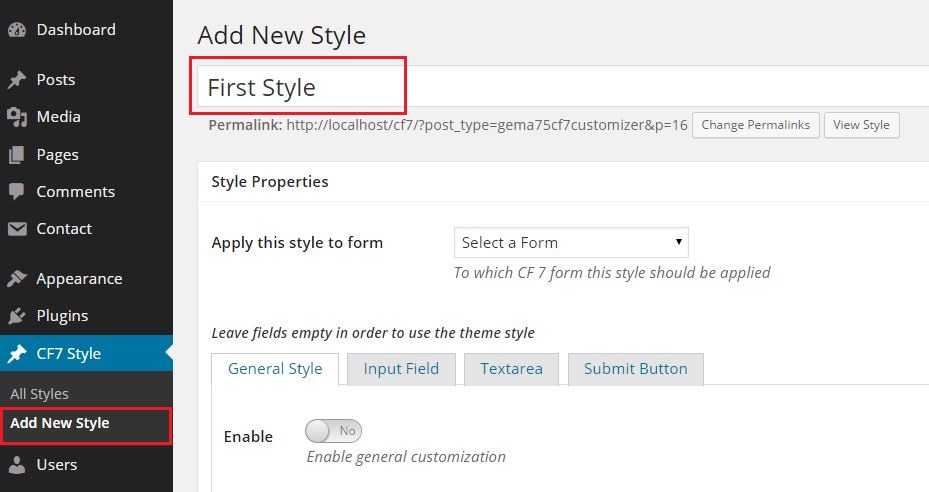
To add a New style - simply click to Add a New Style . Name your style with a title
F)Assign the Style to the Contact Form 7 - top
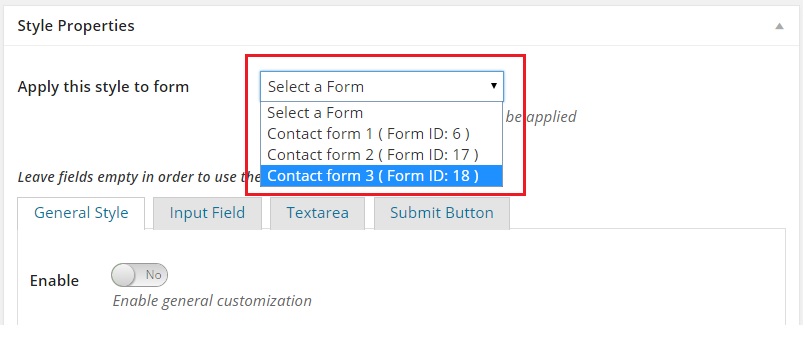
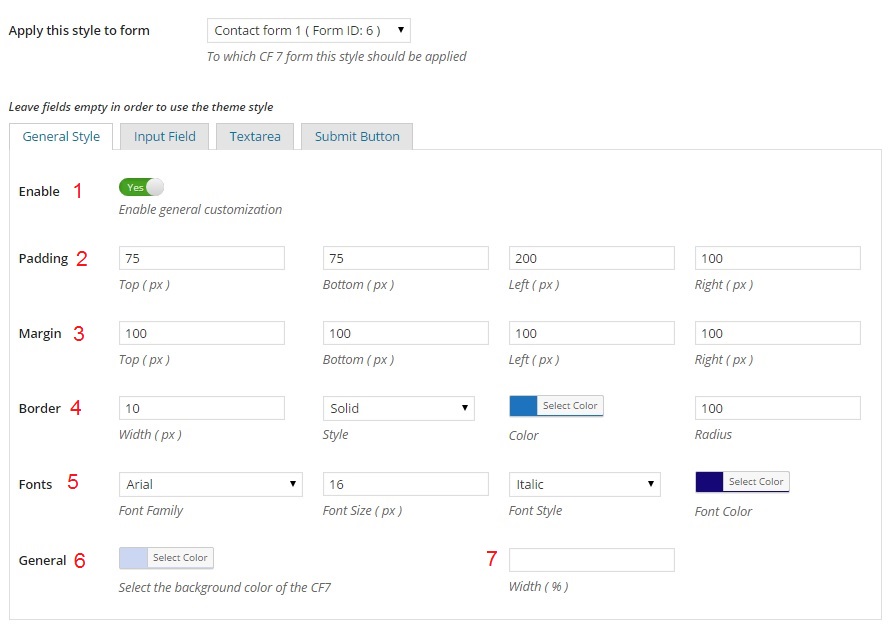
Previosly using the Contact Form 7 plugin you had created one or more forms . A list of the existing form will be displayed to the drop down list "Apply this style to form". Select the desired list to assign the style which you are creating or created already . A Style can be created and assigned to the contact form any time .
G)Configure General Style - top
Enable general customization in case that this tab style will be configured .
1.Enable YES/NO the style for the General Tab using the slide yes/no option .2.Padding of the Entire Form(top, bottom , left , right),in px .
3.Margin of the Entire Form(top, bottom , left , right),in px .
4.Border of the Entire Form Using this option can be set :
the width of the border in px ,
the style using the drop down selecting one of the options - Don't Customize , None, Solid , Dashed , Dotted , Double , Groove , Inset ,Outset , Ridge ,
the color - using the color picker ,
the border radius in px,
4.Fonts of the Entire Form Using this option can be set :
Font Family drop down font list ,
Font Size in px ,
Font Style using the drop down selecting one of the options - Don't Customize ,Normal , Italic ,Underline ,Overline
Font Color - using the color picker ) ,
6.Form Background Color using the Color picker ,
7.Form Width The width it is an optional option to resize the form in % .This is an option to resize your form to the desired width and it is also responsive.
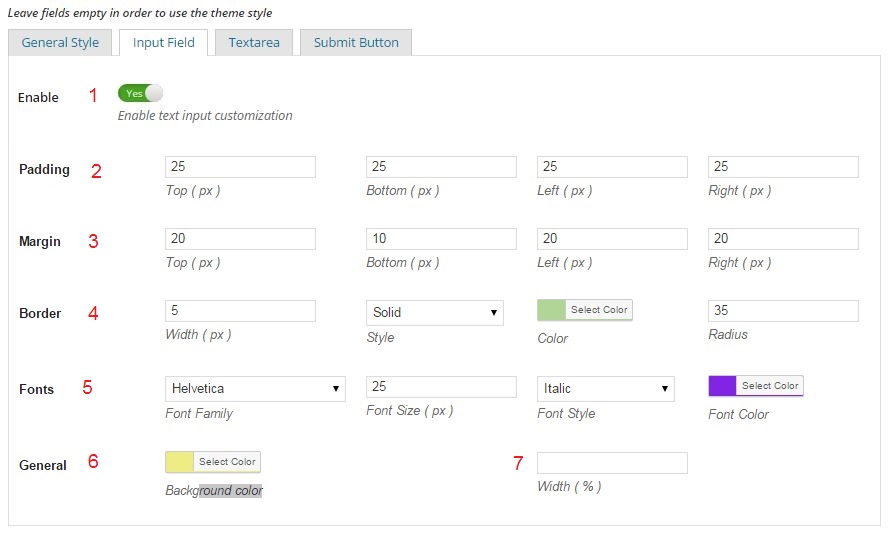
H)Configure Input Field Style - top
The Input Text usually are the fields as Name , Surname , Email , Phone .
Enable text input customization in case that this tab style will be configured .
1.Enable YES/NO the style for the Text Input Tab using the slide yes/no option .2.Padding of the Input Text (top, bottom , left , right),in px .
3.Margin of the Input Text (top, bottom , left , right),in px .
4.Border of the Input Text Using this option can be set :
the width of the border in px ,
the style using the drop down selecting one of the options - Don't Customize , None, Solid , Dashed , Dotted , Double , Groove , Inset ,Outset , Ridge ,
the color - using the color picker ,
the border radius in px,
4.Fonts of the Input Text Using this option can be set :
Font Family drop down font list ,
Font Size in px ,
Font Style using the drop down selecting one of the options - Don't Customize ,Normal , Italic ,Underline ,Overline
Font Color - using the color picker ) ,
6.Input Text Background Color using the Color picker ,
7.Input Text Width The width it is an optional option to resize the Input Text Box in % .This is an option to resize your form to the desired width and it is also responsive. In case that you have used this option to the General tab be sure to use it in this tab also .
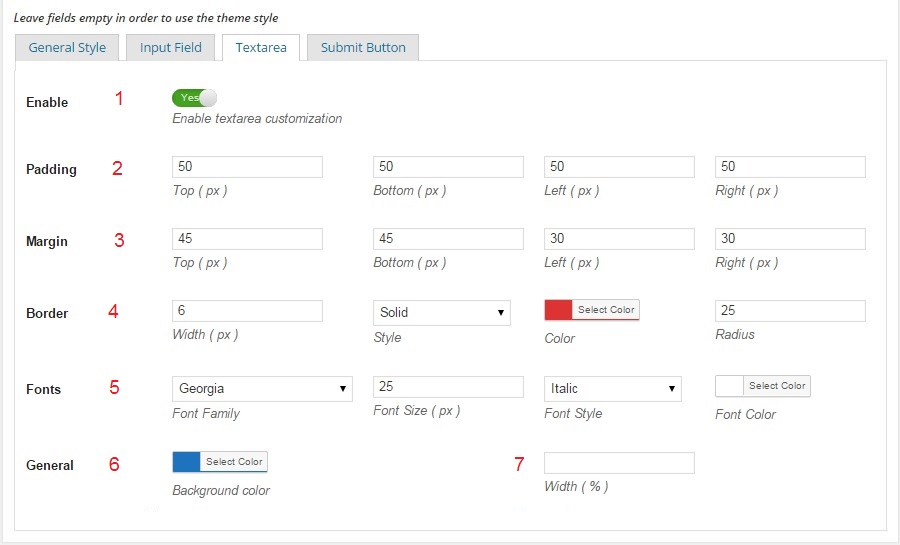
I)Configure Textarea Style - top
The Textarea usually is the field as Message .
Enable Textarea customization in case that this tab style will be configured .
1.Enable YES/NO the style for the Textarea Tab using the slide yes/no option .2.Padding of the Textarea (top, bottom , left , right),in px .
3.Margin of the Textarea (top, bottom , left , right),in px .
4.Border of the Textarea Using this option can be set :
the width of the border in px ,
the style using the drop down selecting one of the options - Don't Customize , None, Solid , Dashed , Dotted , Double , Groove , Inset ,Outset , Ridge ,
the color - using the color picker ,
the border radius in px,
4.Fonts of the TextareaUsing this option can be set :
Font Family drop down font list ,
Font Size in px ,
Font Style using the drop down selecting one of the options - Don't Customize ,Normal , Italic ,Underline ,Overline
Font Color - using the color picker ,
6.Textarea Background Color using the Color picker ,
7.Textarea Width The width it is an optional option to resize the Input Text Box in % .This is an option to resize your form to the desired width and it is also responsive. In case that you have used this option to the General tab be sure to use it in this tab also .
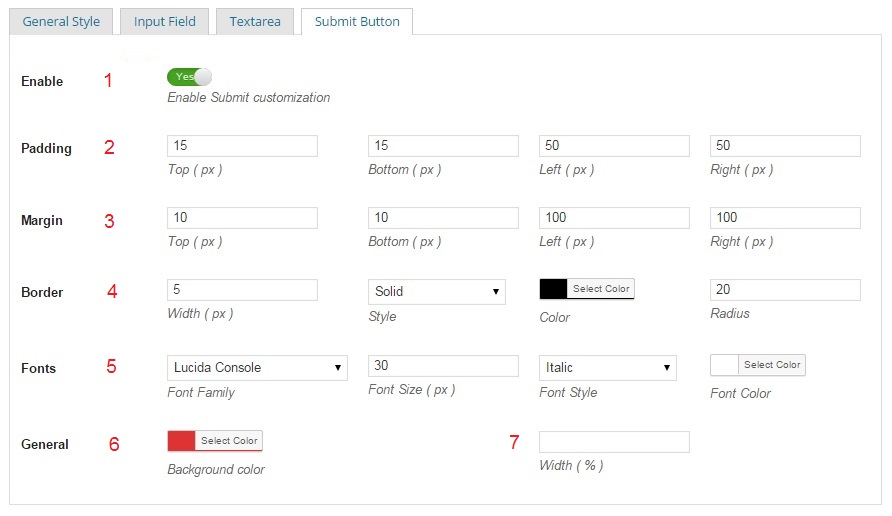
J)Configure Submit Button Style - top
The Submit Button is the field named usually as Send .
Enable Submit Button customization in case that this tab style will be configured .
1.Enable YES/NO the style for the Submit Button Tab using the slide yes/no option .2.Padding of the Submit Button (top, bottom , left , right),in px .
3.Margin of the Submit Button (top, bottom , left , right),in px .
4.Border of the Submit Button Using this option can be set :
the width of the border in px ,
the style using the drop down selecting one of the options - Don't Customize , None, Solid , Dashed , Dotted , Double , Groove , Inset ,Outset , Ridge ,
the color - using the color picker ,
the border radius in px,
4.Fonts of the Submit ButtonUsing this option can be set :
Font Family drop down font list ,
Font Size in px ,
Font Style using the drop down selecting one of the options - Don't Customize ,Normal , Italic ,Underline ,Overline
Font Color - using the color picker ,
6.Submit Button Background Color using the Color picker ,
7.Submit Button Width The width it is an optional option to resize the Input Text Box in % .
K)Publish / Save Form Style - top
Once created the desired style for the form , Enabled each tab where the style it is created , assign this style to the form . Publish the Form Style so the changes will take effect .L)Rules to follow - top
1.Assing only one style per Contact Form .
2.Width Option for the responsive design - This is an option to resize your form to the desired width and it is also responsive. In case that you have used this option to the General tab be sure to use it in the Input and Textarea tab also .
Once again, thank you so much for purchasing this plugin. As I said at the beginning, I'd be glad to help you if you have any questions relating to this plugin. I'll do my best to assist. If you have a more general question relating to the plugin on Codecanyon, you might consider visiting the forums and asking your question in the "Item Discussion" section.
Gema75